Thursday, May 11, 2017

Setting up the Datio Point of Sale Cash Register for iPad with Cash Drawer, Receipt Printer and Stand for Datio POS Software

How to get started:
This system only works with the Datio POS software available from the Apple App Store. Buy the hardware from https://www.amazon.com/dp/B01MYAL5WN.


  1. In box: Cash Drawer, Printer, iPad Stand, 2x Charger Cables and Wall Charger and 1 Roll of Paper.  Credit card reader is shipped for free when your merchant account is set up.  Use only one charging cable, one goes direct to iPad or if using the credit card reader use the other cable to the reader and the reader charges the iPad.
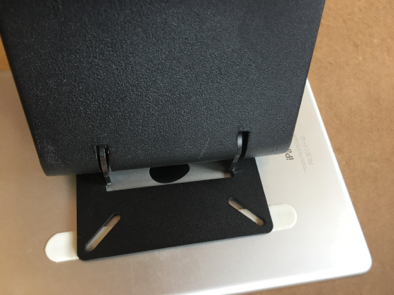
  2. Find the stand and remove it from the bag or bubble wrap.  Practice putting the iPad on the stand before removing the red striped tape liners.  The iPad home button should be on the right side.  This is important.  Once you understand the orientation remove the 4 tape liners and place the Stand on the iPad.  Center the Apple logo in the stand.  Push down very firmly.  Set the stand up like the 3rd picture overnight for the tape to cure.


  3. Find the correct swiper adaptor for your iPad.  It is in the box with the swiper.  The adaptors are labeled; Air2 works with the Pro.  Push the adaptor on to the credit card reader; follow the orientation in the second picture.  (Note:  Shipped separately when merchant account set up)

  4. Plug the charging cord into the credit card swiper.  Plug the other end of the charging cable into the wall brick.  Plug the credit card reader onto the iPad.  Route the cable through the stand as shown.  You can also plug this into the wall.  If you are not using the credit card swiper simply use your iPad charger cable we supplied.


  5. Turn the cash drawer upside down and plug in the small cable to the cash drawer.  This same small cord will plug into the printer.  Plug the power connect; into the printer, note the flat part of the power connector faces up.  Put the paper in the printer and then turn on the printer.

  6. From the back and front your system should look now like this.  Some people like to put the printer on the cash drawer or on the counter.  Either is okay.  

  7. Download the App by searching for Datio POS in the Apple App Store.
  8. Start the Datio POS App.  Register and enter your email address. You will receive a verification code in your email and via text message.  Then enter the code and push continue registration.   
  9. You are now ready to accept cash sales. Call Vantiv at 800-846-4472 to set up credit cards, text us that you need the credit card reader.  We also can supply a chip (EMV) credit card reader.
  10. You can now start to use the register.  Click + to Add Item, enter price and save to cart.  Or give the item a name and price and save it for next time.
  11. You can manage your business from your laptop or iPad by going to manage.datiopos.com.
Other helpful hints
  • Use Extra to set up taxes.  You can set up 5 different taxes
  • Use Extra \ Custom Setup to enable tips
  • To do a refund, click Extra then Transaction and Refund list, search or pick the transaction, then hit return, and pick the items to return
  • After adding an item to the cart  use “+” to increase item quantity and “-“ to decrease it.  If item quantities are decreased to zero, the item is deleted.
  • Want to delete the complete cart?  Swipe to the right on the total and cart is cleared.
  • Do a discount by holding the total to discount the complete cart or tap the price of the item in the cart to discount that item.


Installing the Datio POS Bluetouch Credit Card Reader for chip cards, EMV and Apple Pay

Installing the Datio POS Bluetouch Credit Card Reader for chip cards, EMV and Apple Pay
Before using the iCMP Bluetooth Credit Card Reader for the first time, it needs to be charged for a minimum of 3 hours. Charge the device for 6 hours for a full charge.

Plug the included micro USB cable into the charging port on the side of the Datio Base station, if supplied use the power brick or the small brick that came with your Datio POS hardware (cash drawer, stand and printer). 


You can mount the payment terminal to the Datio POS Base Station or Datio Cash Drawer with the Datio POS payment bracket.  Attach the bracket with two screws to the underside of the Base Station or Cash Drawer, mount the ICMP with the double sided tape supplied with the bracket.  Or keep the terminal loose and at the cleke side of the POS.

Then follow the instructions below for pairing with the iPad.it is too powerful. Only use the provided charging brick or a cell phone charging brick.

Pairing with the iPad
Use the instructions below to pair the iCMP Bluetooth Credit Card Reader with iPad.  On the iPad, visit the Settings app, then tap 'Bluetooth'. Tap to toggle Bluetooth (GREEN) to on position.  
 
Turn the reader on by briefly pressing the power button on the right.  

When 'BT Pairing Required' appears, press the F1 button to select iOS to begin. 

Select the iPad by pressing the F2 (down) or F3 (up) keys on the reader.  Then press the GREEN button to get your BT Pairing Pin.

You will now see the iCMP payment device ready to Pair, as it shows the PIN.

On the iPad, a pop-up will appear. Enter the PIN from the reader and press 'Done'.  You have 1 minute to pair the reader and iPad.  If you run out of time be patient; it will appear again.

In the Settings app, under MY DEVICES, a device labeled “iCMP…” will appear and the card reader will display the DATIO POS logo.  The reader might show downloading EMV, again be patient.
Now you're ready to process credit cards with this device.

Basic Functions
Follow along below to learn more about the iCMP’s basic functions, such as turning the reader on and off.

Turning On the Card Reader
Press the power button on the right to turn the reader on.  

Wait for the reader to boot up. It will show an Ingenico or a DATIO POS logo.

Turning off the Card Reader
Unplug the iCMP Bluetooth Credit Card Reader from power.  Simultaneously hold down the yellow "<" key and the ".,#*" key on the reader for a few seconds.

Unpairing the iCMP
  • You will need to un-pair the reader from the iPad if you are pairing it with another iPad.  
  • On the iPad, visit the iPad Settings App and select 'Bluetooth'.
  • Under DEVICES, tap the circled “i” icon next to the device labeled “iCMP…”
  • Tap 'Forget This Device' then 'OK' on the confirmation screen.
  • With the reader powered on, press the black 'F' key four times in quick succession.  “BT Pairing Required” will now be on screen. If you don’t see this, repeat step 4 above.
  • You are now free to re-pair the reader to this or another iPad.

Turn on EMV in the DATIO POS App
Go To Extras \ Custom Set Up \ EMV to get to the EMV settings.

Turn “ON” Ingenico iCMP, tap “OK” on the message Connect to EMV from Settings (no need to go to settings), and then tap “Save.”

Accepting Credit Cards
The iCMP supports a few different types of credit payments. Follow the steps below to learn how to accept swiped credit cards, EMV chip cards, and Apple Pay (Coming soon).
Swipe
When a customer has a card with only a magnetic stripe, process a swiped credit card sale.  Ring up a credit transaction as normal and select 'Credit'.  With the card stripe facing up, swipe the card through top slot of the iCMP credit card reader. Wait for payment to be approved and continue closing the transaction as normal.

EMV
If a customer has a chip card, run an EMV transaction by dipping the card.  Ring up a transaction as normal and select 'Credit'.  Wait for the iPad and iCMP to prompt for insertion of the card.  Insert the card at the bottom of the iCMP (chip end first). Follow the instructions on the Ingenico iCMP payment terminal. Most common is F3 for Yes to accept amount, then remove card. 

Visa debit cards might give two choices Visa Debit and US Debit.  US Debit will require a PIN, US Debit will not. Use the F2 and F3 keys to move the selection, green button to select.

Once the screen indicates the transaction has been authorized and the card can be removed, complete the sale by removing the card.  Give the DATIO POS App a second to react after the card is removed.

Apple Pay
For customers who want to pay with their iPhone, use Apple Pay. Ring up a transaction and select the 'Credit' tender option.  At the register, the customer holds their iPhone within 1" of the credit card reader while touching the home button on their phone.  The iPhone will automatically open Apple Wallet.  Customer waits for a slight vibration, a check mark and a beep, indicating payment confirmation. Wait for payment to be approved and continue closing the transaction as normal.

UK Credit Card Processing Set Up with Handpoint EMV Reader

Set up Merchant account for credit card processing sales@handpoint.com.

How to get started:
This system only works with the Datio POS software available from the Apple App Store.  Simply search “Datio POS,” from your iPad in the Apple App store.

  1. In box: the Datio Base Station, power cable, 2 rolls of paper, cash drawer  key, 3 iPad trays for different iPads, Handpoint bracket with 2 screws and cash drawer keys. 
  2. The Handprint credit card terminal will ship separately to you at no additional charge once you finish setting up your merchant account (sales@handpoint.com).  Or you can use your own terminal by turn on terminal credit.
  3. Supports iPads with 8-pin lightning connectors, (the smaller connector).  These are the Apple iPad 4, iPad Air, iPad Air 2 and iPad Pro 9.7”.  The unit comes with the iPad Air tray installed.  For the iPad 4 or iPad Air you need to remove the 4 screws and change the tray.  Use the Air 2 tray for the iPad Pro 9.7”
  4. Base station does not support iPad Mini or iPad Pro 12.9”.
  5. Push the iPad into the Base Station, then push in the connecter on the right.
  6. Plug in the power cable on the  bottom  of the base station.  Then plug into the wall.
  7. Download the App by searching for Datio POS in the Apple App Store.
  8. You can mount the Handpoint unit on the front of the Base Station or keep it loose.  Keeping the Handpoint terminal loose but plugged in allows you to run the card instead of your customer for faster service.  To mount try placing the Handpoint on the bracket before removing the tape covers, after understanding the fit then go to the next step.
  9. Remove the tape’s cover pieces, line up the bottom and two sides then press the HandPoint reader on the tape firmly.
  10. Use the two screws to attach the HandPoint bracket to the bottom of the cash register as show below.
  11. Find the USB charging cable that came in the HandPoint box plug in and route like below.
      
  1. Start the Datio POS App.  Register and enter your phone number, email address. You will receive a verification code in your SMS and email.  Then enter the code and fill out the registration form.
  2. You are now ready to accept cash sales,  email Handpoint at sales@handpoint.com to set up credit cards.
  3. You can now start to use the register.  Click + to Add Item, enter price and save to cart.  Or give the item a name and price and save it for next time.
  4. You can manage your business reports from your laptop or iPad or phone by going to browser manage.datiopos.com.
Handpoint Set up in the App
  • Hold the power button to turn on the Handpoint unit.
  • On your iPad, go to the iPad’s settings, make sure bluetooth is on and look for a device with name like PP01915912345
  • Select this device, you will see a  message “Bluetooth Paring Request,” select “Pair.”  Don't worry the Handpoint unit might show a code like 0000 it might not match the code the iPad shows. The code is not required to pair the device. It pairs automatically.
  • In the Datio POS app now go to Extras then EMV and turn on Handpoint EMV, click Save.  Having trouble, turn off  here, save then try turning on again.
  • Next add an item to the cart, hit the total in the lower right to do sale, then hit Credit.  The terminal will now show updating Software.  Please be patient, it takes some time.  You might need to select the PP09150XXXXX device at the first sale.  The second sale will be fast.
  • If you set up your account with Handpoint you will now be able to  accept credit cards.

Trouble shooting the Handpoint connection:
If you get a message “No reader connected / OK” please try the following.

  • Make sure Handpoint unit is turned on  and says “Welcome”
  • Go to iPad settings \ Bluetooth and make sure device PPXXXXXXXX is connected, if it says disconnected turn BT off and on and try picking the device again.
  • Go to Datio POS \ Extras \ Custom Setup \ EMV and turn Handpoint EMV off then save.  Go to Extras \ Custom Setup \ EMV, turn Handpoint EMV on select PinPad and Save
  • Try transaction again